 Digital patterns
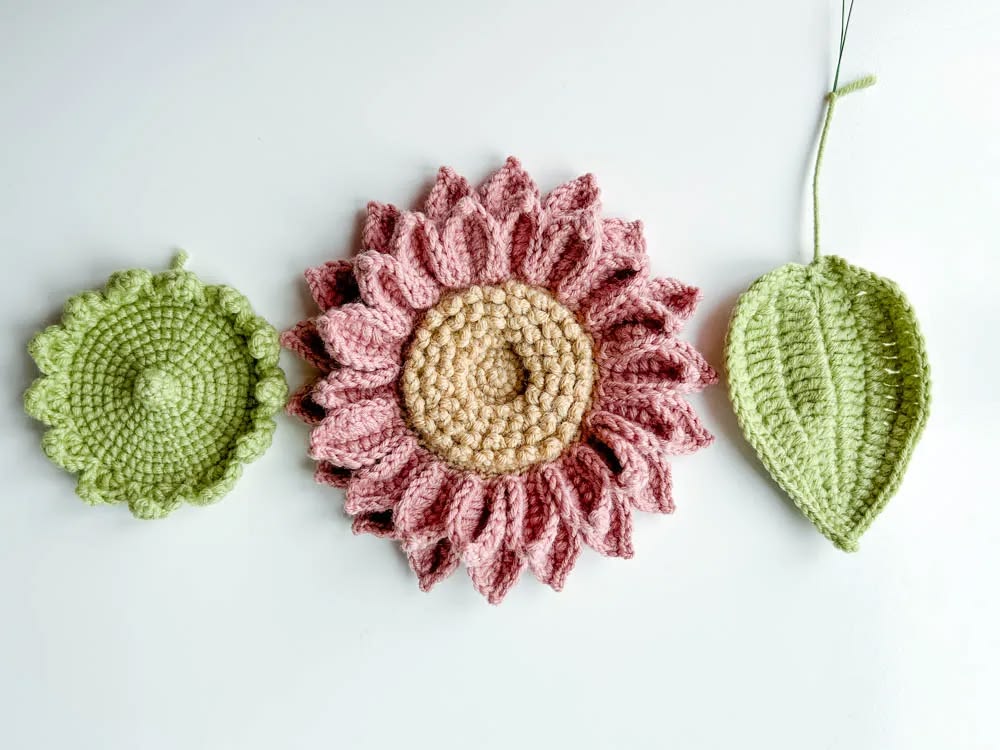
Make a sunflower with a textured centre and two layers of petals using this free crochet sunflower pattern. The written instructions cover the flower centre, seed-like surface stitches, green sepal, 18 small petals, 18 large petals and a wired leaf.
Use the finished sunflower as the focal flower in a vase or handmade bouquet. Explore our free crochet flower bouquet patterns for more flowers and foliage to make alongside it.
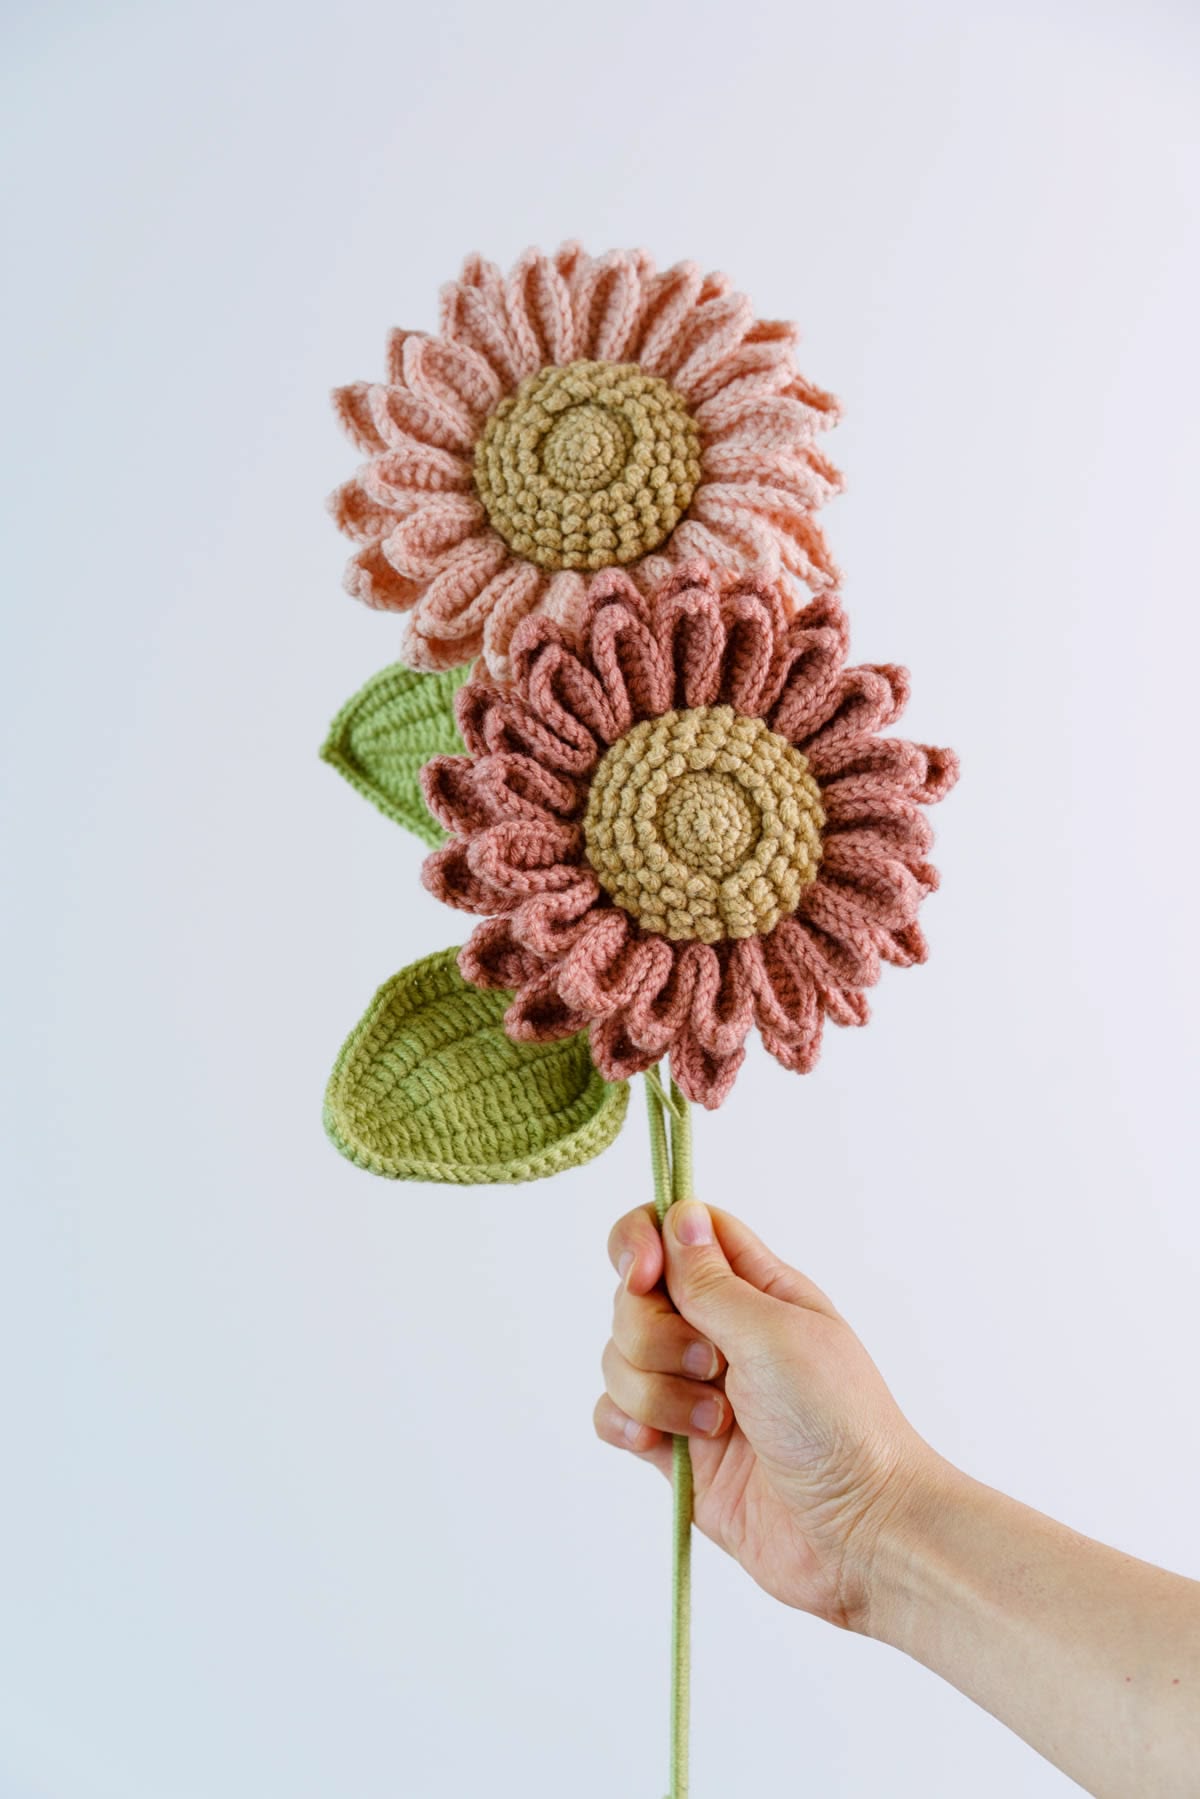
Sunflower Colours and Bouquet Ideas
Choose yellow petals and a brown centre for a classic sunflower, or use pink, purple or green for a decorative variation. Plan the palette before starting so your sunflower coordinates with the rest of the arrangement.
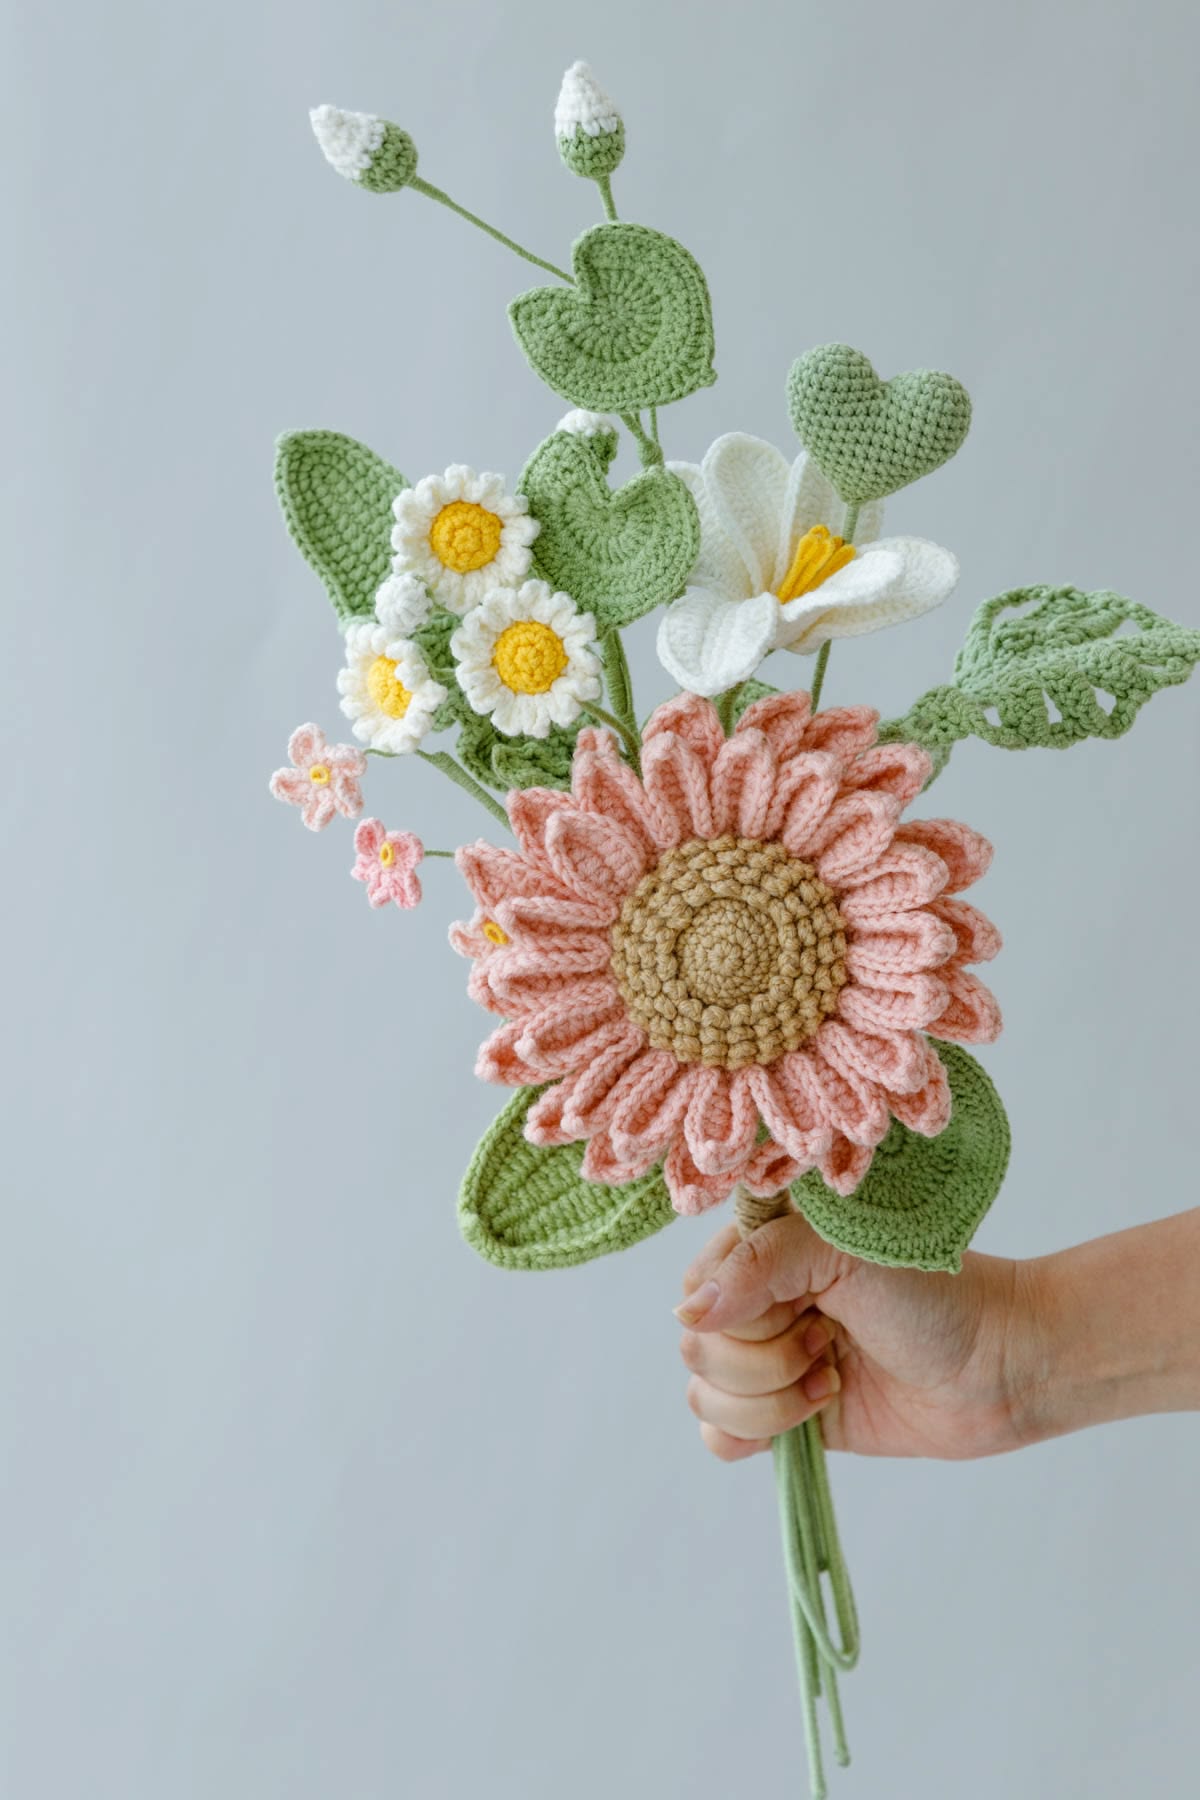
Let the sunflower be the main bloom, then add smaller flowers or green leaves around it. The bouquet photos provide colour and arrangement inspiration; individual flower designs may differ from the sunflower made in this tutorial.
Materials for the Crochet Sunflower
The sample palette uses pink, khaki and green. Choose your preferred petal colour, a contrasting centre colour and green for the sepal, leaf and stem wrapping.
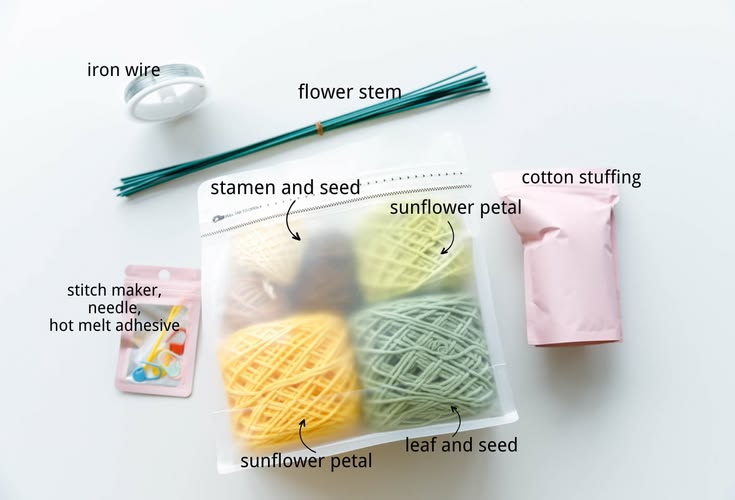
- Yarn in three colours: petal colour, centre colour and green
- 2.5 mm or 3.0 mm crochet hook, adjusted to suit your yarn and tension
- Flower rods approximately 40 cm long and 2 mm in diameter: one main rod and two additional rods for the reinforced assembly described below
- 0.4 mm craft wire, cut to fit the petal edging and leaf, with extra length for securing the ends
- Stitch markers
- Darning or tapestry needle
- Scissors
- Hot glue and a glue gun
- A small amount of fibre filling for the flower centre
Make a small sample with your chosen yarn and hook to check that the stitches form a firm fabric. The finished size depends on yarn thickness and tension; no fixed gauge is specified.
Terminology and Special Stitches
This pattern uses US crochet terminology. It involves joined rounds, front-loop and back-loop work, surface texture, wired edging and assembly. Practise those techniques first if they are new to you.
Abbreviations
- ch: chain
- ss: slip stitch
- sc: single crochet
- hdc: half double crochet
- dc: double crochet
- tr: treble crochet
- st / sts: stitch / stitches
- sk: skip
- BLO: back loop only
- FLO: front loop only
- R: round
Working into Front or Back Loops
Viewed from the top, a crochet stitch has two loops. The front loop is nearest to you; the back loop is farther away. Work the named stitch normally, inserting your hook through only the specified loop.
For example, BLO sc means single crochet into the back loop only. FLO dc means double crochet into the front loop only, and FLO ss means slip stitch into the front loop only.
Picots
The pattern uses different chain lengths for the decorative points. Make the number of chains stated, then slip stitch into the first chain of that small chain group.
- 3-ch picot: ch 3, then ss into the first of those 3 chains.
- 2-ch picot: ch 2, then ss into the first of those 2 chains.
- 1-ch point: ch 1, then ss into that chain. This is the short point used at the petal tips.
Pattern Notes
- Numbers in square brackets show the stitch count at the end of a round.
- Joining slip stitches and the following ch 1 do not count toward the stated round total.
- “Sc in the next 3 sts” means one single crochet in each of those stitches. “2 sc in the next st” means an increase in one stitch.
- Work each bracketed sequence the stated total number of times.
- Keep the front loops available where back-loop work is specified; they are used later for the seed texture and petals.
- Mark the beginning of centre R5, R9 and R10 so you can find the later attachment rounds.
- When adding wire, crochet over it to enclose it in the edging. Secure and conceal the wire ends before assembly.
Step-by-Step Crochet Sunflower Pattern
1. Sunflower Centre
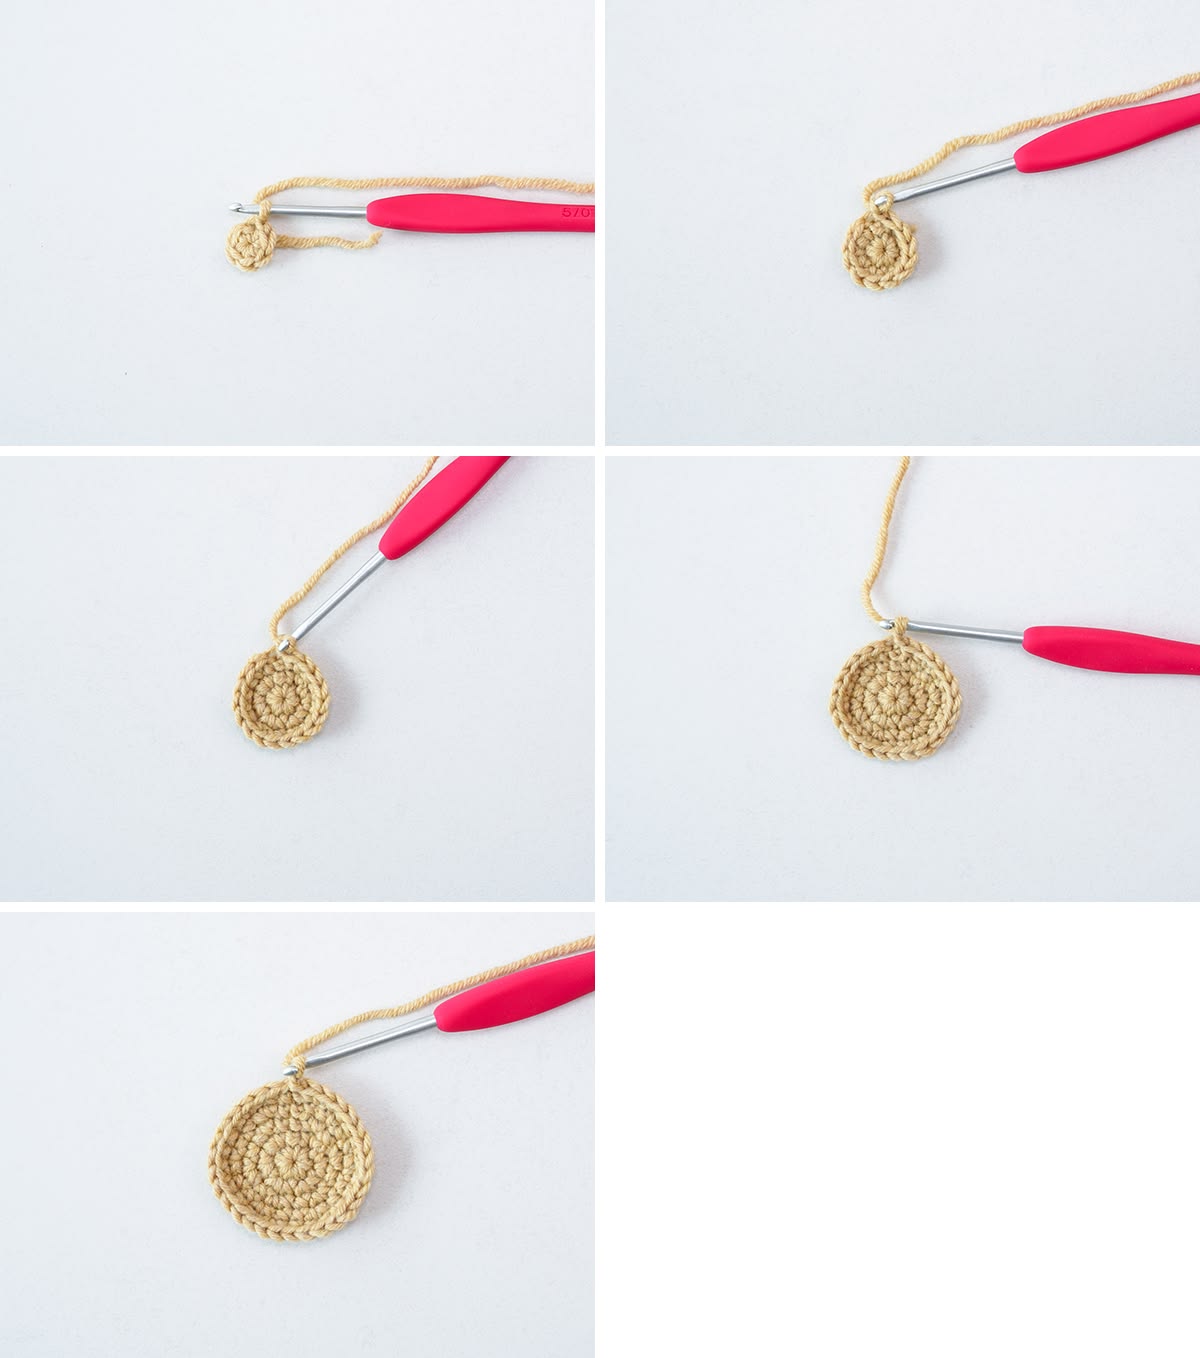
Use your centre-colour yarn. Begin with a magic ring.
- R1: Work 6 sc into the ring. Join with 1 ss, then ch 1. [6]
- R2: Work 2 sc in each st around. Join with 1 ss, then ch 1. [12]
- R3: Repeat [1 sc, 2 sc in the next st] 6 times. Join with 1 ss, then ch 1. [18]
- R4: Repeat [1 sc, 2 sc in the next st, 1 sc] 6 times. Join with 1 ss, then ch 1. [24]
- R5: Repeat [sc in the next 3 sts, 2 sc in the next st] 6 times. Join with 1 ss, then ch 1. Mark the beginning of this round. [30]
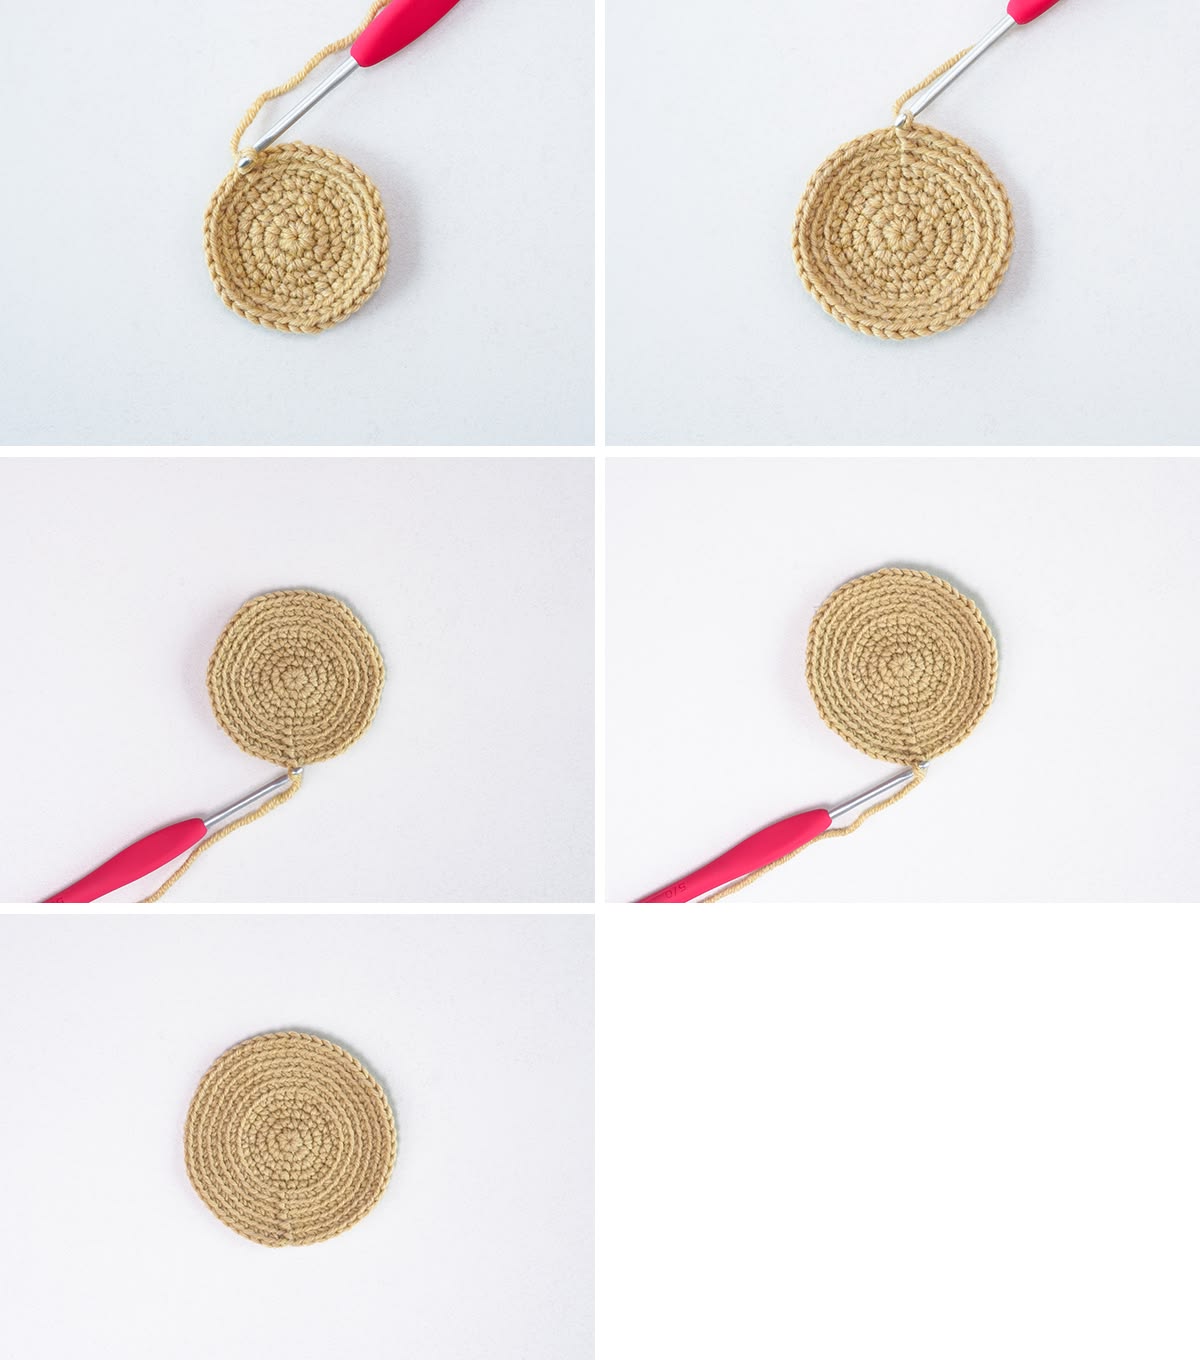
- R6: Working in BLO, repeat [sc in the next 2 sts, 2 sc in the next st, sc in the next 2 sts] 6 times. Join with 1 ss, then ch 1. [36]
- R7: Working in BLO, repeat [sc in the next 5 sts, 2 sc in the next st] 6 times. Join with 1 ss, then ch 1. [42]
- R8: Working in BLO, repeat [sc in the next 3 sts, 2 sc in the next st, sc in the next 3 sts] 6 times. Join with 1 ss, then ch 1. [48]
- R9: Working in BLO, repeat [sc in the next 7 sts, 2 sc in the next st] 6 times. Join with 1 ss, then ch 1. Mark the beginning of this round. [54]
- R10: Work 54 BLO sc. Join with 1 ss, then ch 1. Mark the beginning of this round and fasten off, leaving a tail. [54]
2. Seed-Like Surface Texture
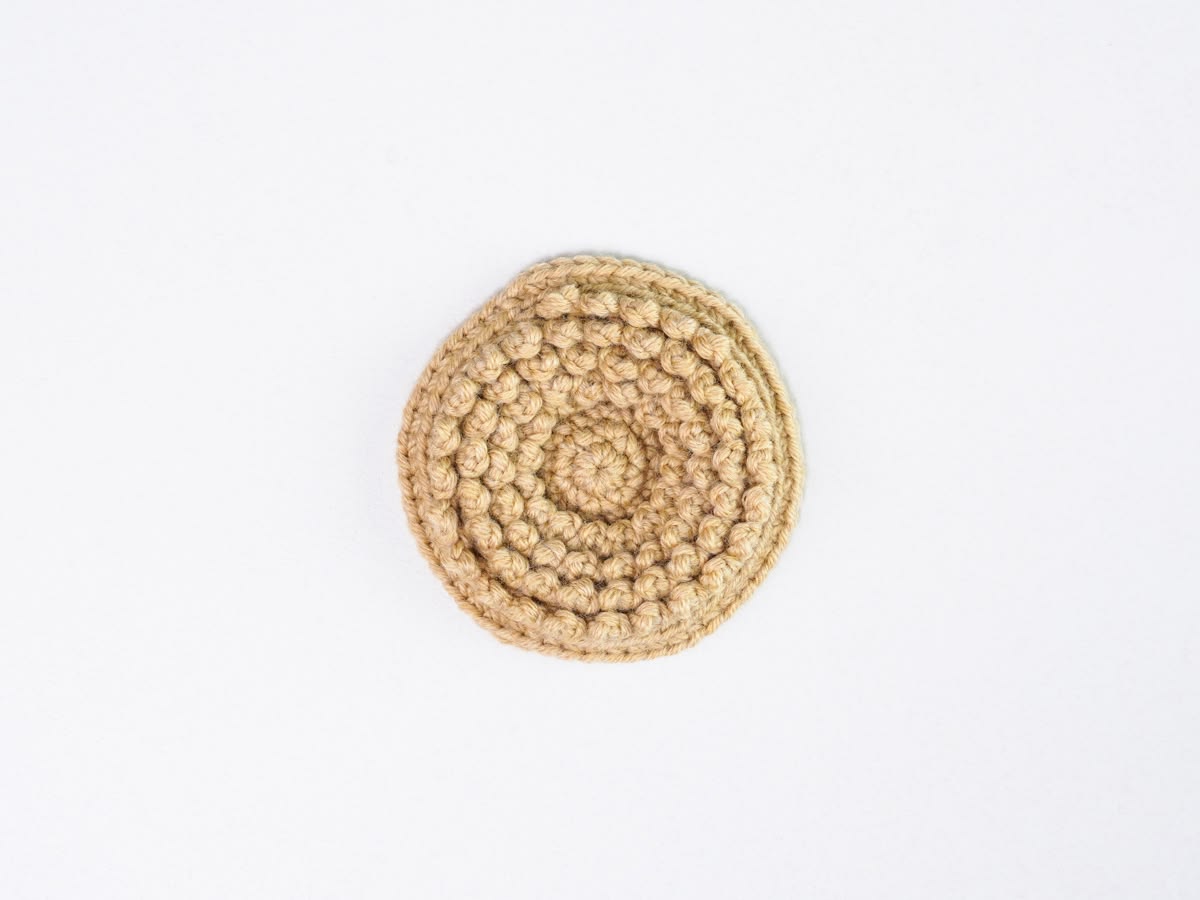
Return to the marked R5 and join centre-colour yarn into an unused front loop.
- R5 surface loops: Repeat [ch 3, ss at the base of that chain group, skip 1 unused front loop, ss into the next unused front loop] around. Move to the next round with a slip stitch.
- R6–R8 surface loops: Repeat the same sequence around the unused front loops of each round. After completing R8, ch 1 and fasten off, leaving a tail.
Keep the R9 and R10 markers in place for the petal layers.
3. Green Sepal
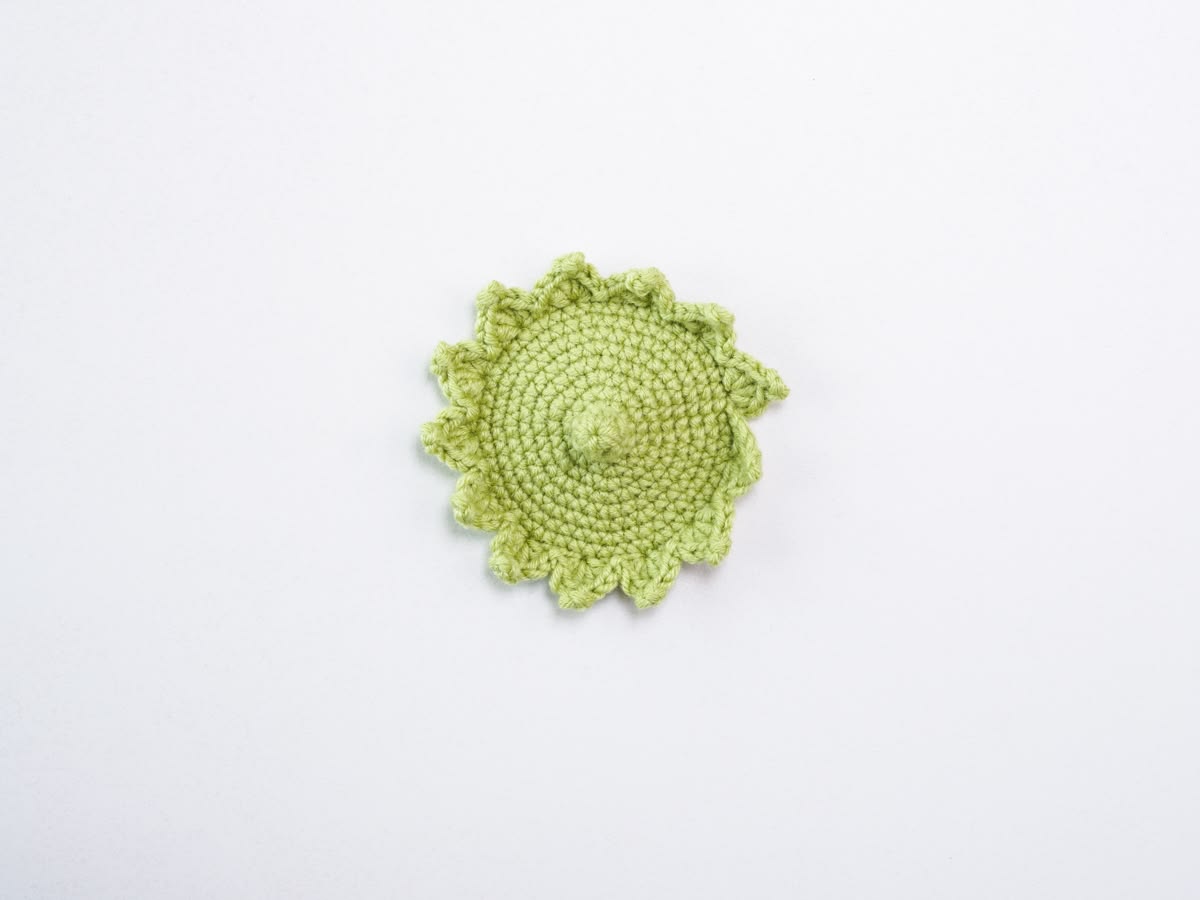
Use green yarn. Begin with a magic ring.
- R1: Work 6 sc into the ring. Join with 1 ss, then ch 1. [6]
- R2–R3: Work 6 sc in each round. Join each round with 1 ss, then ch 1. [6]
- R4: Work 2 sc in each st around. Join with 1 ss, then ch 1. [12]
- R5: Repeat [1 sc, 2 sc in the next st] 6 times. Join with 1 ss, then ch 1. [18]
- R6: Repeat [1 sc, 2 sc in the next st, 1 sc] 6 times. Join with 1 ss, then ch 1. [24]
- R7: Repeat [sc in the next 3 sts, 2 sc in the next st] 6 times. Join with 1 ss, then ch 1. [30]
- R8: Repeat [sc in the next 2 sts, 2 sc in the next st, sc in the next 2 sts] 6 times. Join with 1 ss, then ch 1. [36]
- R9: Repeat [sc in the next 5 sts, 2 sc in the next st] 6 times. Join with 1 ss, then ch 1. [42]
- R10: Repeat [sc in the next 3 sts, 2 sc in the next st, sc in the next 3 sts] 6 times. Join with 1 ss, then ch 1. [48]
- R11: Repeat [sc in the next 7 sts, 2 sc in the next st] 6 times. Join with 1 ss, then ch 1. [54]
- R12: Working in FLO, repeat the following sequence 13 times: ch 1, skip 1 st; work [2 dc, 3-ch picot, 2 dc] into the next st; ch 1, skip 1 st; ss into the next st.
- Finish R12: Work 1 FLO ss into each of the remaining 2 sts, then join with 1 ss. Ch 1 and fasten off, leaving a tail.
Sepal finishing note: the 13 decorative groups use 52 of the 54 stitches from R11. The final two slip stitches finish the remaining stitches while keeping 13 sepal points. This written adjustment has not been test-crocheted.
4. Small Petal Layer — 18 Petals
Join petal-colour yarn into the unused front loops of centre R9, using the marker to locate the beginning.
- Repeat 18 times: ch 8; starting in the second chain from the hook, work 7 sc back along the chain; skip 1 centre st, then work 1 FLO ss into each of the next 2 centre sts.
- Join with 1 ss, then ch 1.
Each repeat uses 3 centre stitches, so 18 repeats fit the 54-stitch round.
Small Petal Edging
Enclose craft wire in the edging as you work. Repeat the following sequence around each of the 18 petals:
- Along the first side: 1 sc, 1 hdc, 3 dc, 1 hdc and 1 sc.
- At the tip, in the same st: [1 sc, 1-ch point, 1 sc].
- Along the opposite side: 1 hdc, 3 dc, 1 hdc and 1 sc; skip 1 st, then work 1 ss.
After all 18 petals, join with 1 ss, ch 1 and fasten off, leaving a tail. Weave in the yarn end and secure and conceal the wire ends.
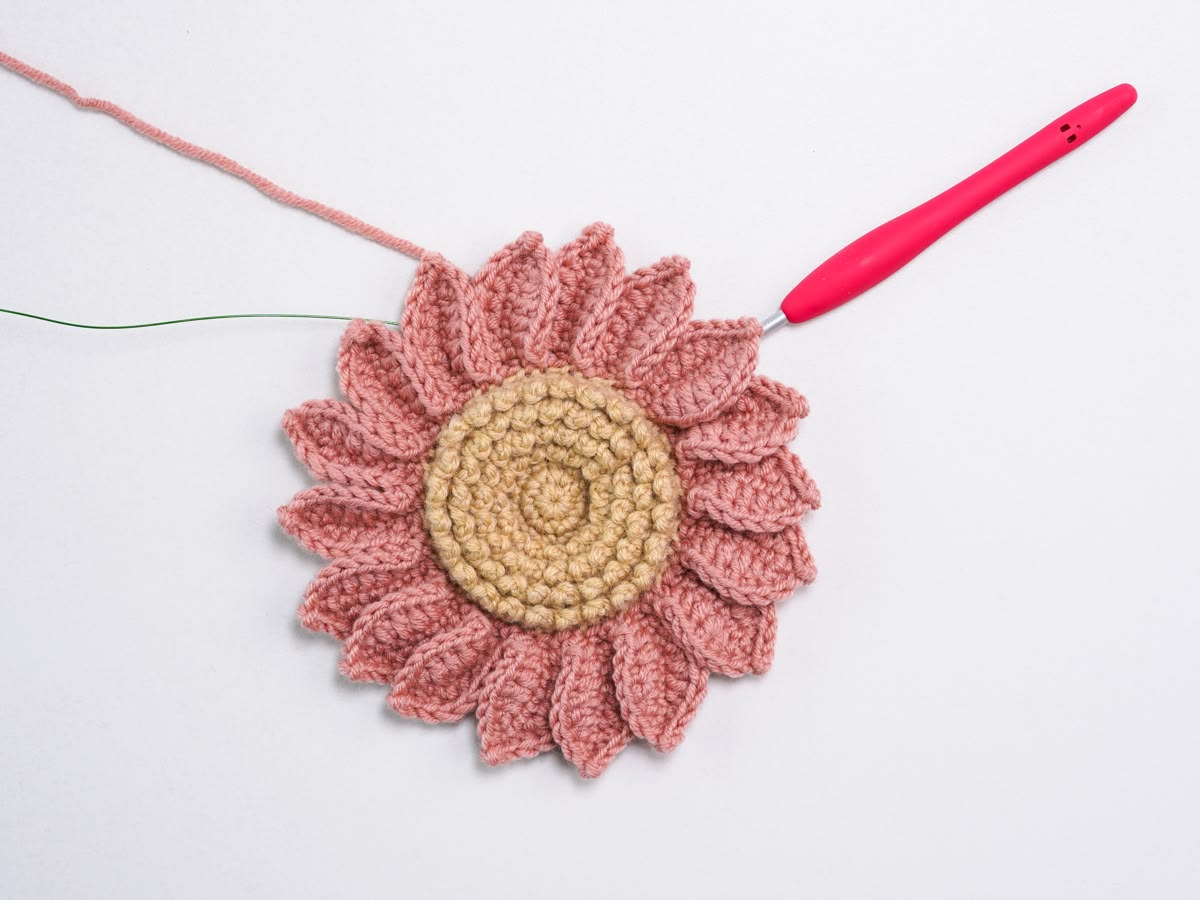
5. Large Petal Layer — 18 Petals
Join petal-colour yarn into the front loops of centre R10, using the marker to locate the beginning.
- Repeat 18 times: ch 10; starting in the second chain from the hook, work 9 sc back along the chain; skip 1 centre st, then work 1 FLO ss into each of the next 2 centre sts.
- Join with 1 ss, then ch 1.
Large Petal Edging
Enclose craft wire in the edging as you work. Repeat the following sequence around each of the 18 petals:
- Along the first side: 1 sc, 1 hdc, 5 dc, 1 hdc and 1 sc.
- At the tip, in the same st: [1 sc, 1-ch point, 1 sc].
- Along the opposite side: 1 hdc, 5 dc, 1 hdc and 1 sc; skip 1 st, then work 1 ss.
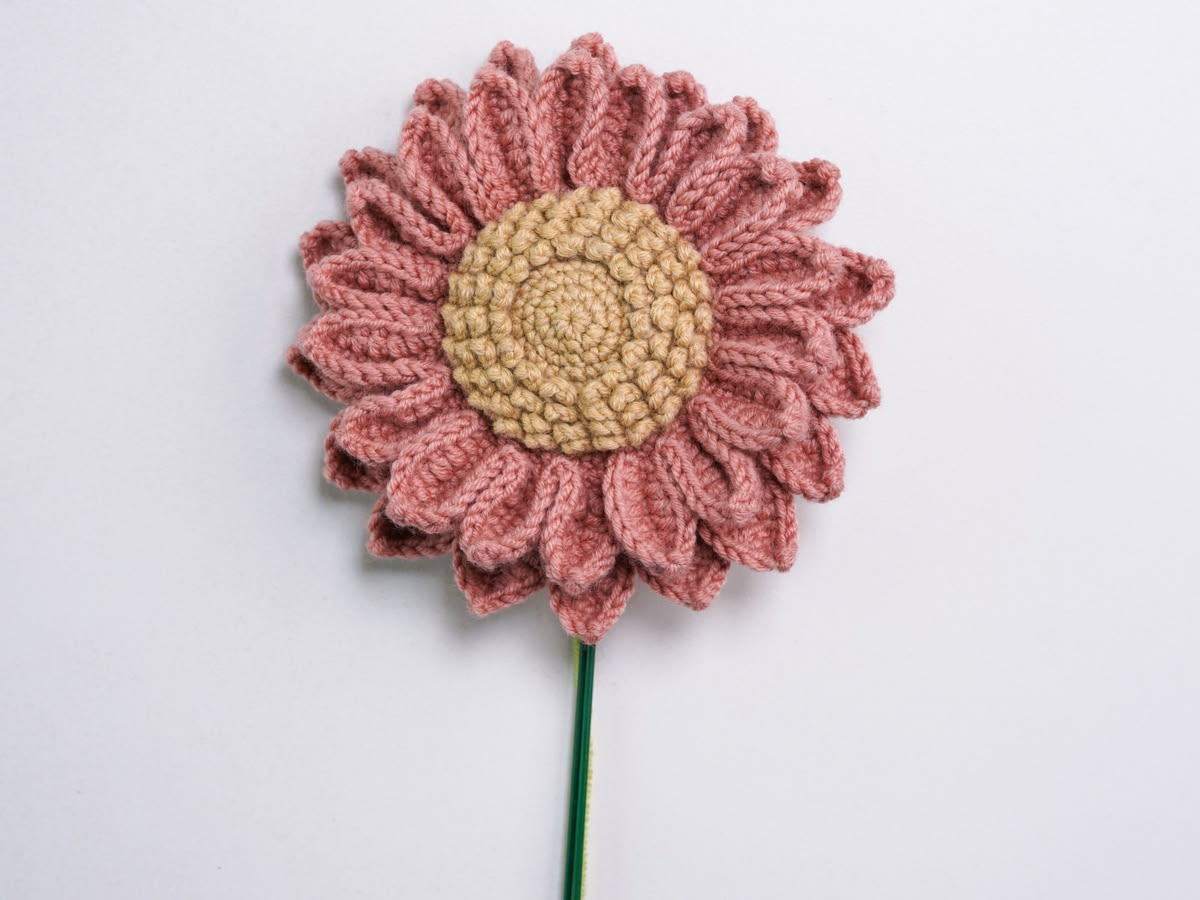
After all 18 petals, join with 1 ss, ch 1 and fasten off, leaving a tail. Weave in the yarn end and secure and conceal the wire ends.
6. Sunflower Leaf
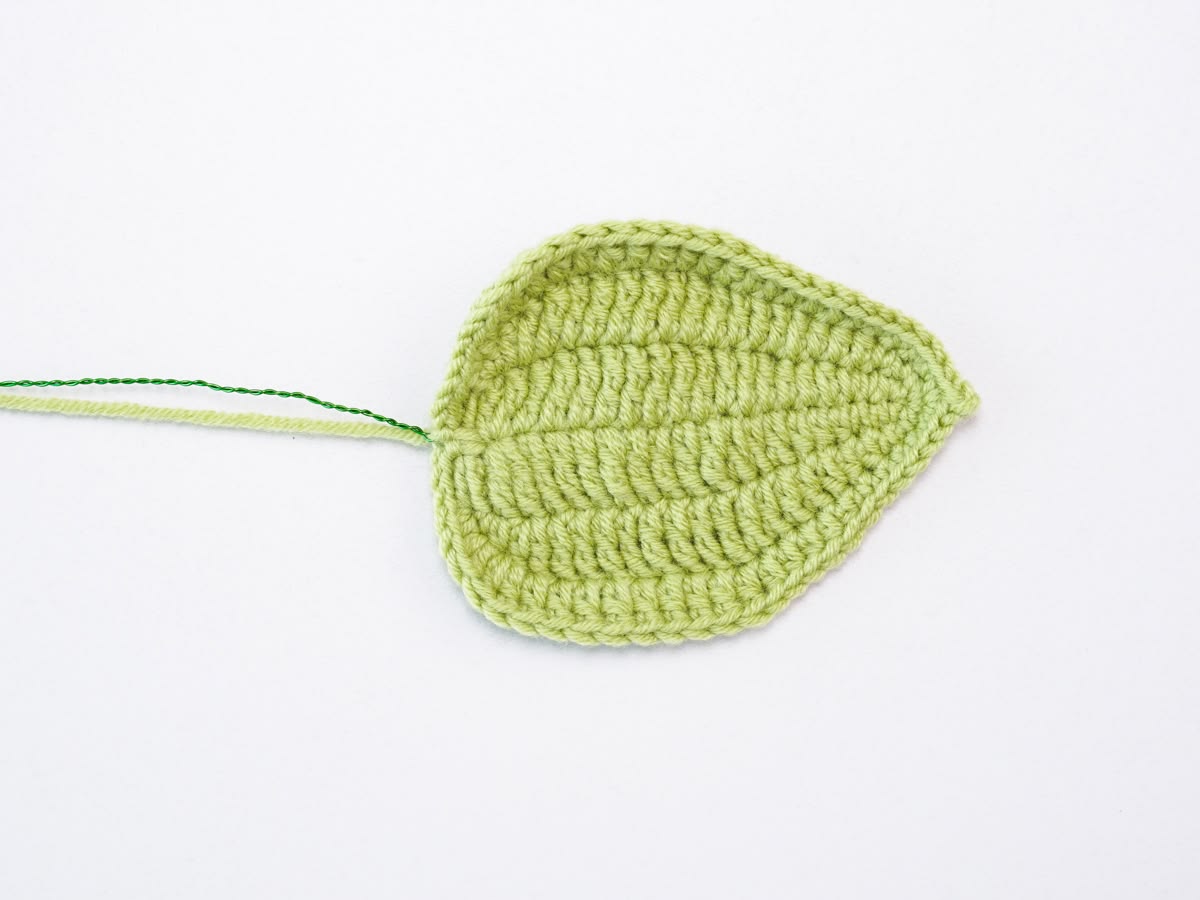
Use green yarn. Begin with 21 ch and enclose wire as instructed.
- R1: Starting in the fourth chain from the hook, work 2 tr into that chain; then 8 tr, 3 dc, 3 hdc and 2 sc along the next chains. Work 3 sc into the final chain. Continue along the opposite side of the foundation chain without turning: 2 sc, 3 hdc, 3 dc and 8 tr; work 2 tr into the next chain. Ch 3, then ss at the base of the starting chain.
- R2: Ch 3. Work [1 sc, 1 hdc] in the same st; [1 dc, 1 tr] in the next st; then 8 tr, 4 dc, 3 hdc and 2 sc. Work 3 sc into the tip st. Continue along the opposite side without turning: 2 sc, 3 hdc, 4 dc and 8 tr; [1 tr, 1 dc] in the next st; [1 hdc, 1 sc] in the next st. Ch 3, then ss at the base of the ch-3.
- R3: Ch 3. Work 2 sc in the next st, 2 hdc in the next st and 2 dc in the next st; then 9 dc, 5 hdc and 5 sc. At the tip, work [2 sc, 2-ch picot, 1 sc] in the same st. Continue with 5 sc, 5 hdc and 9 dc; 2 dc in the next st, 2 hdc in the next st and 2 sc in the next st. Ch 3, then ss at the base of the starting chain. Fasten off, leaving a tail for wrapping.
How to Assemble the Crochet Sunflower
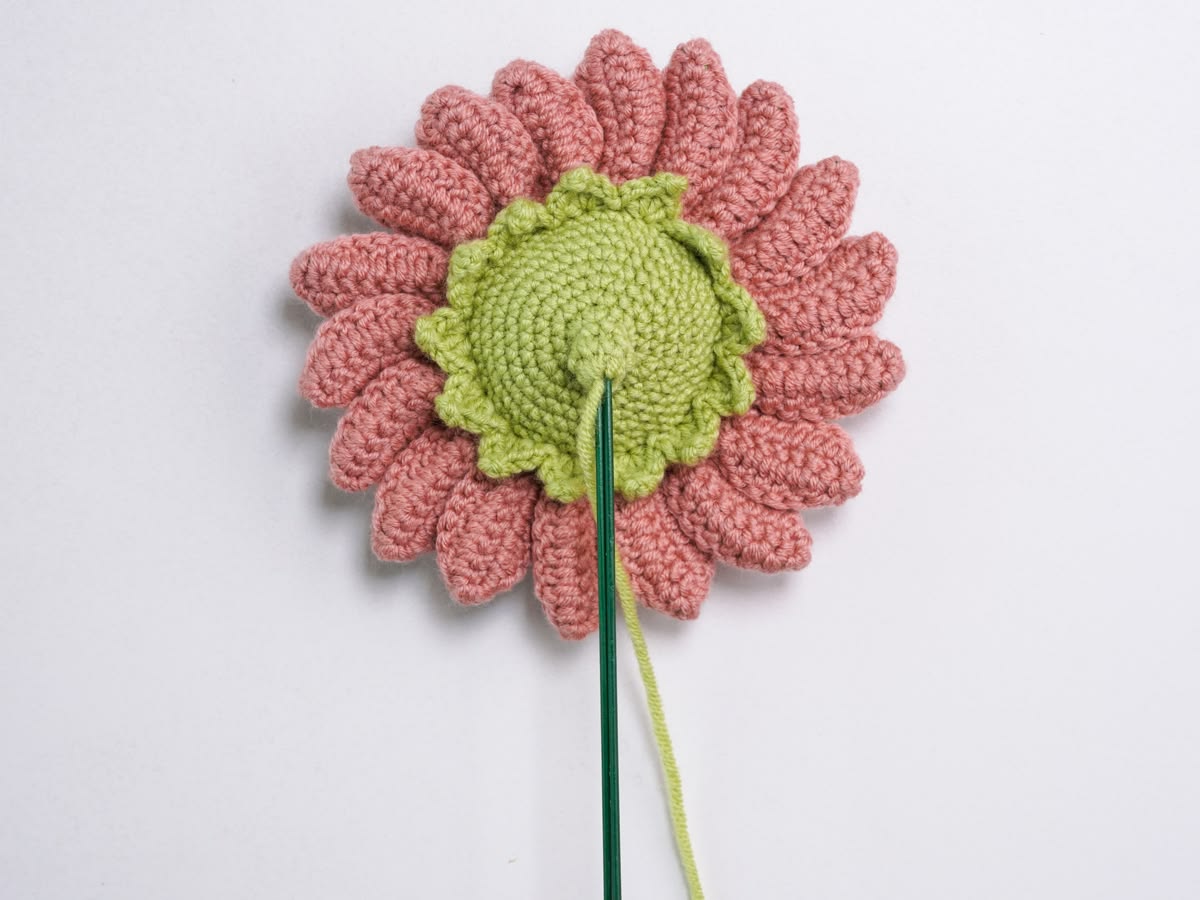
- Bend one end of the main flower rod and insert it through the centre of the sepal.
- Bend the ends of two additional rods and secure them against the sepal with hot glue to reinforce the stem attachment.
- Using green yarn, sew the sepal to the back of the flower centre. Leave a small opening, add a little fibre filling, then sew the opening closed.
- Wrap the rods with green yarn. Position the leaf along the stem and secure its base as you wrap.
- Continue wrapping to the end of the stem. Cut the yarn and secure the end with hot glue.
Gently shape the wired petals and leaf after assembly, keeping the smaller petals visible above the larger layer.
Turn Your Sunflower into a Handmade Bouquet
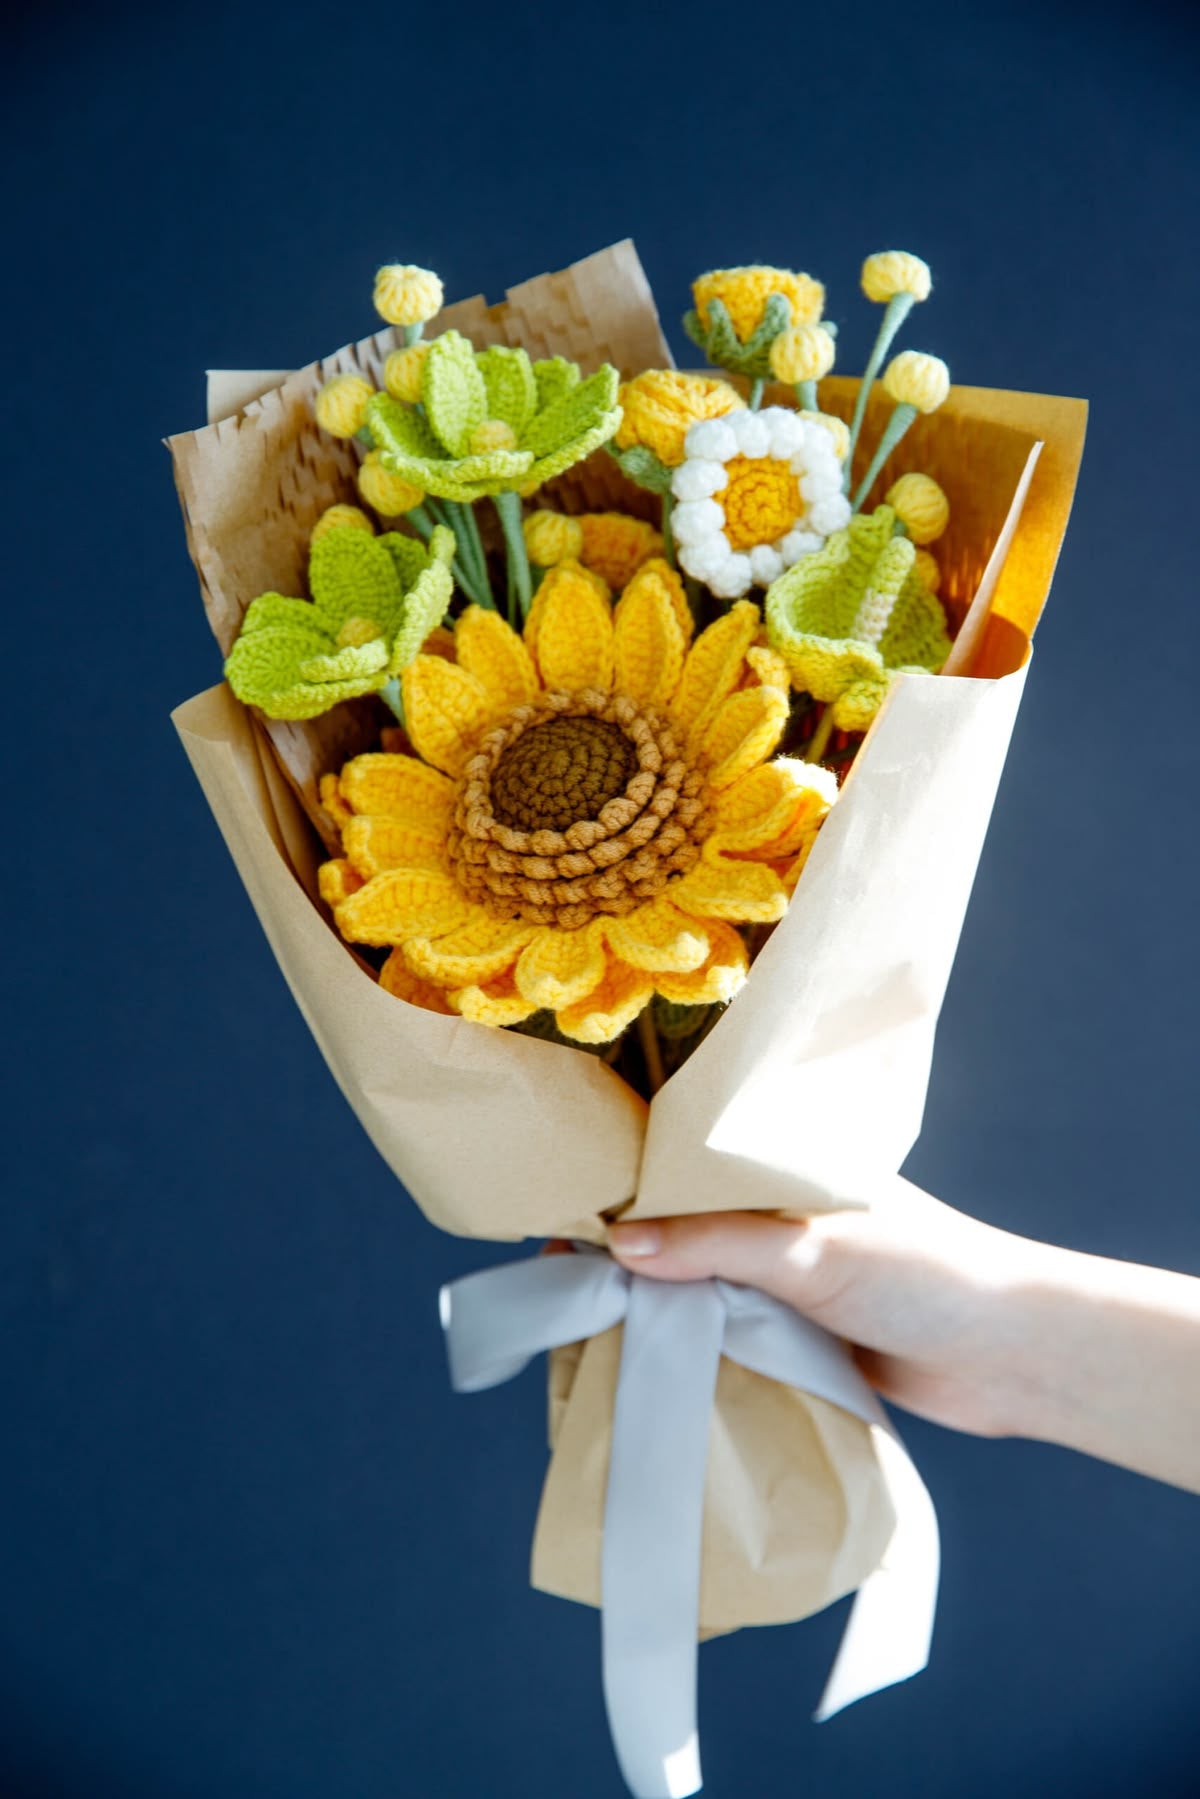
Keep the sunflower as the focal bloom and add other crochet pieces around it. Roses provide a fuller shape, small white flowers add contrast, and green foliage connects the arrangement.
The photos below are shape and colour references for planning your own handmade bouquet.


More Free Patterns for Your Sunflower Bouquet
Pair your sunflower with a crochet 3D rose, a crochet tulip or a crochet fern leaf. Find more combinations in our free crochet flower bouquet pattern collection.
Keep the Sunflower Theme: Crochet Blanket PDF Patterns
If you love sunflower colours and botanical details, carry that theme into a blanket. Kathwool's sunflower C2C PDFs let you follow a floral design as a colour chart or written colour sequences.
Choose a bouquet of golden sunflowers or a large layered bloom. These are separate C2C blanket projects, each with its own design and instructions.

Sunflower C2C Blanket PDF Pattern
Three golden sunflowers with green foliage and a ribbon, arranged against an ivory background.
4 English-language PDF files for one design. See the product page for the included formats and skills required.
View PDF Pattern
Layered Sunflower C2C Blanket PDF Pattern
A full golden sunflower, a smaller bud and green foliage in a framed botanical composition.
5 English-language PDF files for one design. See the product page for the included formats and skills required.
View PDF PatternBoth designs use large 240 × 340-block charts. Those numbers describe C2C blocks, rather than finished measurements. Check the product details and make a gauge swatch to plan your blanket size and materials.
Digital PDF patterns: download the files and crochet the project using your own yarn and tools. You can read the PDFs digitally or print the pages you need.
Browse Botanical Crochet PDF Patterns
For another three-dimensional flower project, explore our free crochet patterns and tutorials.